


Free Excel Expense Report Template (+ Sheets, PDF, CSV), Updated for 2026
By Doug
Last updated: May 2026
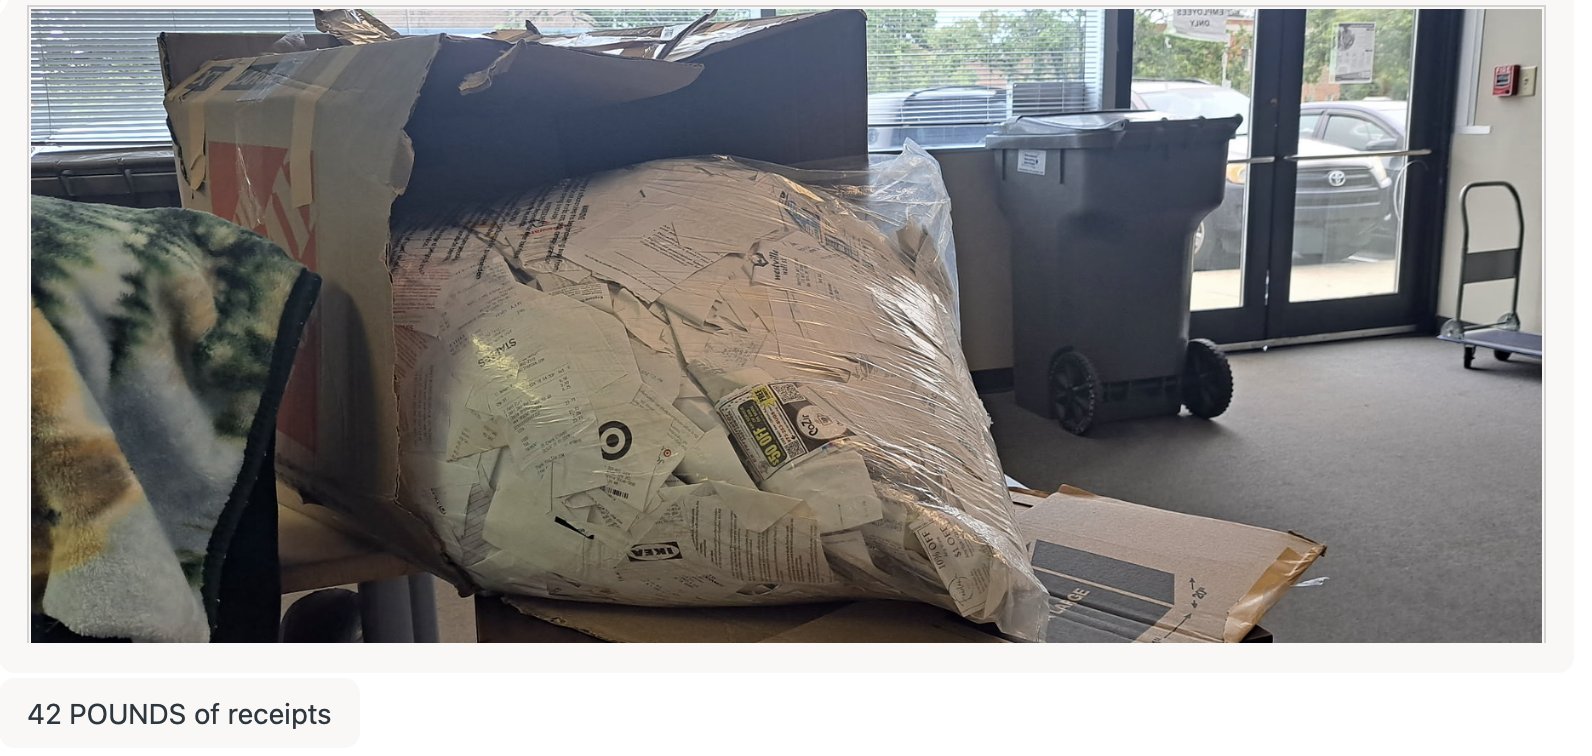 A customer mailed us forty-two pounds of receipts in one shipment. We love scanning receipts!
I pulled 2.4 million receipts from over 12,000 small businesses on Shoeboxed and looked at what categories real people use. Then I built this expense report template around what the data showed.
Driving for Uber or Lyft? There's a version built for Uber drivers with platform fees, car washes, and a standard-mileage vs actual-expenses comparison.
Grab any of the four formats below with no email gate, no signup, and no “free trial” trapdoor. The same template works for Excel users, Google Sheets users, PDF printers, and accountants who want raw CSV.
This post covers the templates, the 15 categories most small businesses need (not the 6 a generic template ships with), how to use it, real deduction math, and the audit habits that hold up.
TL;DR, the four steps:
- Download the format you want (Excel, Sheets, PDF, or CSV).
- Enter receipts row by row. Pick a category from the dropdown.
- Total at month-end. The Excel and Sheets versions auto-total.
- Save the original receipt (photo or paper). Keep records 3 years from the filing date.
Download the free expense report template
Pick whichever format matches how you work. All four live on shoeboxed.com and none ask for your email.
- Excel (.xlsx). Formulas pre-built, dropdown for the 15 categories, opens in Excel 2010 and later.
- Google Sheets. One-click copy to your own Drive, auto-totals as you type.
- PDF. Print-ready, fill in by hand or in Acrobat.
- CSV. Raw data for accountants, QuickBooks imports, or your own spreadsheet.
The template is yours either way. We didn’t build it as a lead magnet.
The 15 expense categories real small businesses use
Here’s the part most expense templates get wrong: they ship with 6 to 8 categories. That’s not enough for a real small business.
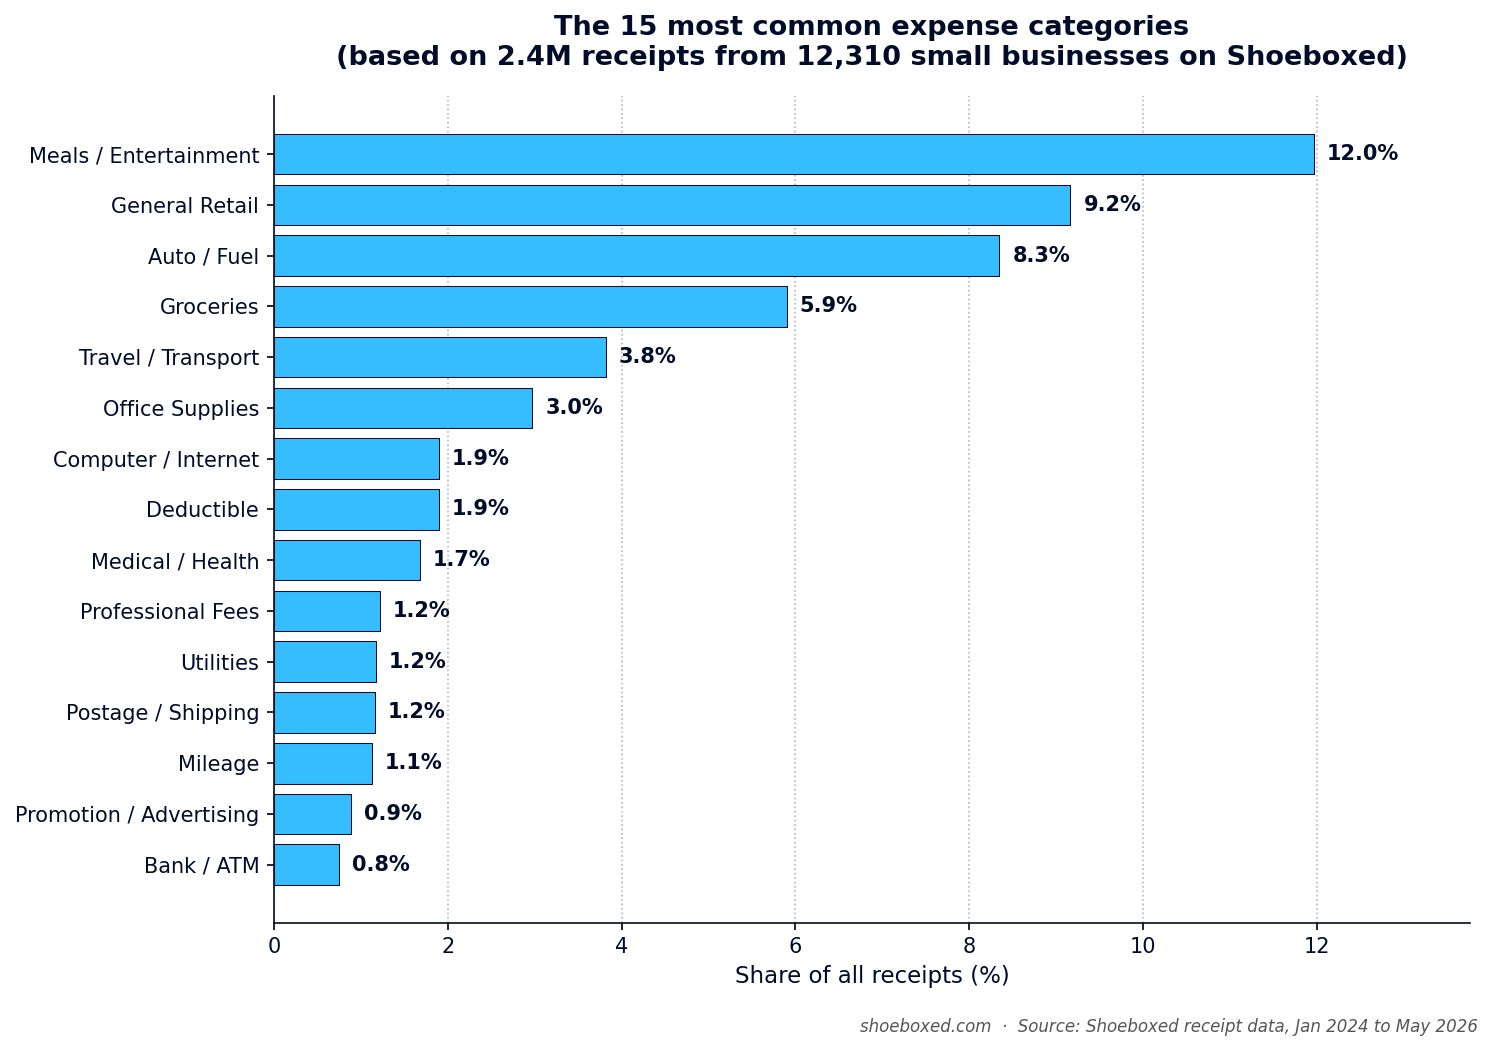
I went and looked. Across 2,429,865 receipts from 12,310 small businesses on Shoeboxed since January 2024, here are the categories that show up most often:
| Rank | Category | Share of receipts |
|---|---|---|
| 1 | Meals / Entertainment | 12.0% |
| 2 | General Retail | 9.2% |
| 3 | Auto / Fuel | 8.3% |
| 4 | Groceries (personal, usually not deductible) | 5.9% |
| 5 | Travel / Transport | 3.8% |
| 6 | Office Supplies | 3.0% |
| 7 | Computer / Internet | 1.9% |
| 8 | Medical / Health | 1.7% |
| 9 | Professional Fees | 1.2% |
| 10 | Utilities | 1.2% |
| 11 | Postage / Shipping | 1.2% |
| 12 | Mileage | 1.1% |
| 13 | Promotion / Advertising | 0.9% |
| 14 | Bank / ATM fees | 0.8% |
| 15 | Insurance | 0.4% |
Top three (Meals, General Retail, Auto/Fuel) cover almost a third of every receipt small businesses file. Each deserves a dedicated category, not a buried sub-line.
A quick note on Groceries: it’s #4 because lots of self-employed folks track grocery runs out of habit. Most of those aren’t deductible on Schedule C. The template includes the column so you can see the receipt, but the label flags it.
Running a food truck? The food truck expense tracker ships with truck-specific categories and a startup worksheet.
Independent contractors: there is also a free 1099 expense tracker spreadsheet with the Schedule C lines built in.
Tracking business costs all year for taxes? Use the ongoing business expense tracker built for Excel, with a Schedule C dropdown built in.
Here’s what surprised me most when I ran the numbers. 28.5% of those 2.4 million receipts have no category attached at all. Almost a third get filed without a tag, and the people filing them use a one-tap app where picking a category is the easiest possible step. On paper or in a generic Excel sheet, the blank rate runs even worse than that.
Here’s what that means at tax time: every uncategorized receipt is a guess, and guesses don’t survive an audit. The fix is a template that locks the category options up front, not a free-text “Type” field where you write “Cost of Goods” one week and “COGS” the next. We see “COGS” spelled four different ways in our own data: COGS, Cost of Goods, Cost of Goods Sold, and Purchases Cost of Goods. Real data runs messy, but your template can stay clean.
The expense report template above ships with these 15 as drop-down options. Pre-defined categories beat free text every time.
Pick your version: simple, monthly, travel, or reimbursement
The same template comes in four shapes. All four use the same 15-category list, so if you start with one and outgrow it, switching is painless.
- Simple / general. One sheet handles every receipt as a row, which fits solopreneurs and side hustles.
- Monthly. Totals roll up by month for freelancers running a clean P&L.
- Travel. Per-trip rows with origin, destination, and notes fit sales reps and consultants. (See IRS Topic 511 for what counts as deductible business travel.)
- Business reimbursement. Extra columns for employees and approvals fit small teams.
Pick the version that fits today. You can always come back for another later.
How to use the template (step by step)
Here’s the workflow most of our customers settle into.
Step 1: Pick the format
Pick the version that matches how you work. Excel handles power users, Google Sheets makes accountant sharing easy, PDF prints for handwriting, CSV pipes into anything else.
Step 2: Gather your receipts
Pull everything together: paper receipts, email confirmations, phone photos, drawer printouts. The inbox folder you never sort counts too. If you write sales by hand, the yellow copies in your receipt book count too.
Step 3: One row per receipt
Fill six fields per row: date, vendor, amount with tax, category, business purpose, notes. Don’t overthink it.
Step 4: Pick the category from the dropdown
Don’t free-type. The 15 categories are there for a reason. Different receipts call for different categories, and consistency is what makes the totals usable in April.
Step 5: Save the original receipt
Keep the original as a photo, scan, or filed paper. The spreadsheet works as the index. The receipt itself proves the expense to an auditor. If you lost a receipt, write a contemporaneous note covering the date, vendor, amount, and reason. That beats nothing.
Step 6: Total at month-end
The Excel and Sheets versions auto-total at the bottom, and for the PDF you add it up by hand. Save the file with the month and year in the filename, and that becomes your monthly expense report.
The whole loop should take less than 10 minutes a month for most one-person businesses.
The 4 things every expense entry needs (per the IRS)
The IRS spells out what counts as adequate records. Every expense entry needs four elements.
“You should be able to prove the elements of an expense or use of property… Generally, you must have documentary evidence, such as receipts, canceled checks, or bills, to support your expenses.”
Source: IRS Publication 463.
The four required elements per entry:
- Date. Record the day you paid.
- Amount. Record what you paid, including sales tax.
- Vendor or payee. Record who you paid.
- Business purpose. Record why this expense counts as business.
That fourth one is the one most people skip, and it’s the one auditors care about most. “Lunch with prospect to discuss Q3 contract” beats a blank notes field every time.
The expense report template has a column for each of the four. Use them all. An entry without business purpose is half a record.
For the official line on which expenses qualify in the first place, see Schedule C and its instructions.
Real deduction math: what tracking is worth in 2026
Let me walk you through the actual numbers.
Say you’re a Schedule C filer with 100 business receipts a year averaging $50 each. That’s $5,000 in business expenses. At a 24% federal bracket (typical for self-employed earning $80K-$160K), that $5,000 cuts your tax bill by $1,200.
Apply the 28.5% blank-tag rate from our data. If 28.5% of your receipts get filed without a category, $1,425 of that $5,000 sits in a “what was this?” pile at tax time. At your accountant’s desk those become “Other” or get dropped. You just paid $342 in unnecessary tax on receipts you already have.
Scale that up to 500 receipts a year and you’re paying roughly $1,710 in unnecessary tax. The fix takes two minutes per receipt at point of purchase instead of eight hours of forensics in April.
Here’s something worth knowing. According to IRS Statistics of Income data on sole proprietorships, Schedule C filers claim $104.2 billion in vehicle and mileage deductions every year and $11.15 billion in home office deductions. Those two buckets carry the most upside from clean records, so if you drive for work and run a dedicated home workspace, you’re leaving real money on the table without them.
Don’t forget mileage. It’s the biggest gap I see.
The same data pull surfaced a gap: Auto/Fuel ranks #3 at 8.3% of receipts, but Mileage ranks #12 at 1.1%.
People log fuel receipts and forget to log the miles those receipts represent. The IRS lets you claim either actual auto expenses (fuel plus maintenance plus depreciation) or the standard mileage rate. For most small business drivers, the mileage rate wins by a wide margin.
The 2026 IRS rate sits at 72.5 cents per business mile. The average self-employed driver covers 12,000 business miles a year. That’s an $8,700 deduction, or roughly $2,088 back at a 24% bracket.
We built a free IRS mileage log template with the same approach as this expense template. Excel, Sheets, PDF, all free, no signup. Use both together for a complete Schedule C kit. Our iOS/Android apps also make mileage tracking dead simple and easy so you don’t forget to log things.
Tracking income too? Our newer free Income and Expense Worksheet ships with the same 15-category expense dropdown plus a second tab for income — same shape, both sides of the ledger.
Driving a heavy truck for a living instead of a car? Our free spreadsheet built for owner-operators ships with a built-in Per-Diem Log tab — the $80/day deduction most truckers miss, plus 15 trucker-shaped expense categories drawn from real owner-operator records.
What 20 years of receipts looks like
Shoeboxed launched in 2007. We’ve processed receipts for almost twenty years, and we see what real small-business expenses look like at scale every day.
The photo at the top of this post? One shipment, one customer, forty-two pounds of paper. That pile had to become digital records before any of those expenses could survive an IRS review.
That customer does it the hardest way, saving every paper receipt for months and mailing the whole pile in one go. The lesson scales to every business: real operations generate more receipts than you remember, and any pile grows faster than your willingness to sort it.
Here’s what happens after a customer mails receipts to us. The one-tap OCR experience runs on more human hands than people realize.
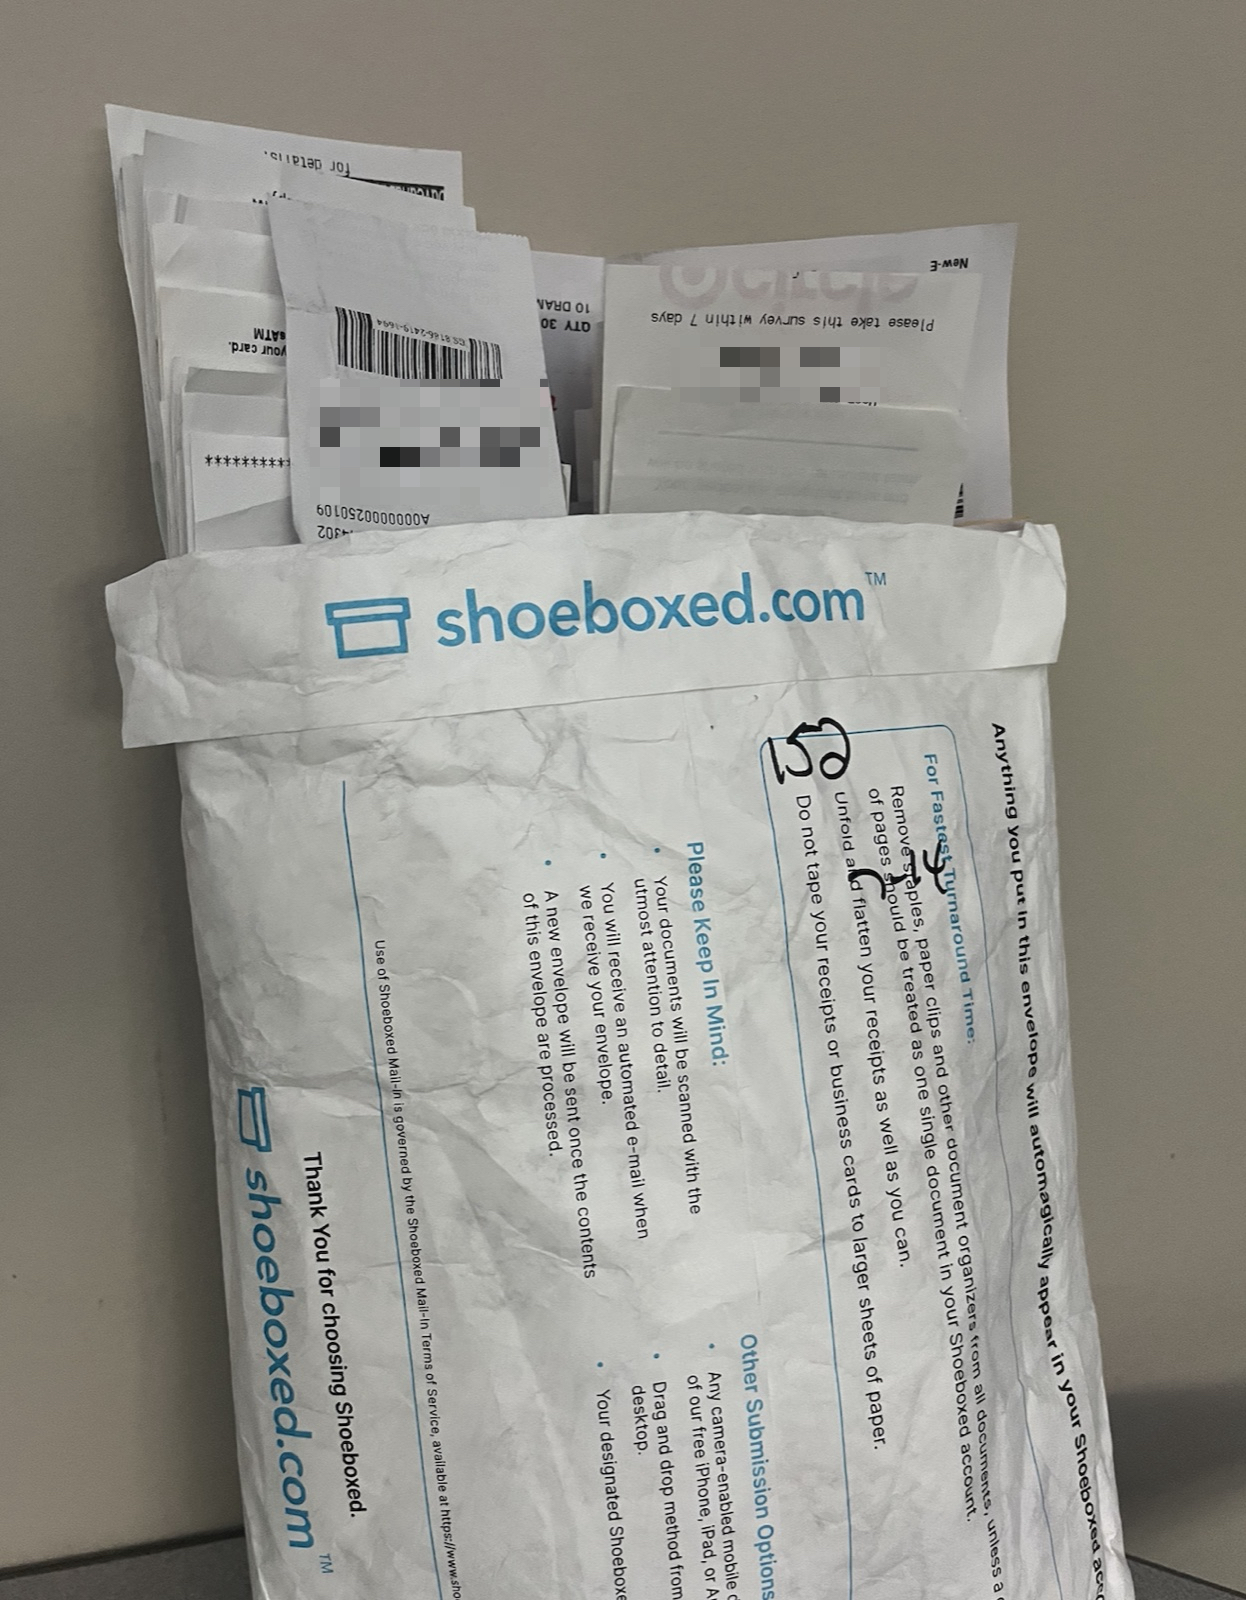 A Magic Envelope arrives. This one had 152 receipts in it. The customer wrote the count on the outside, which we appreciate.
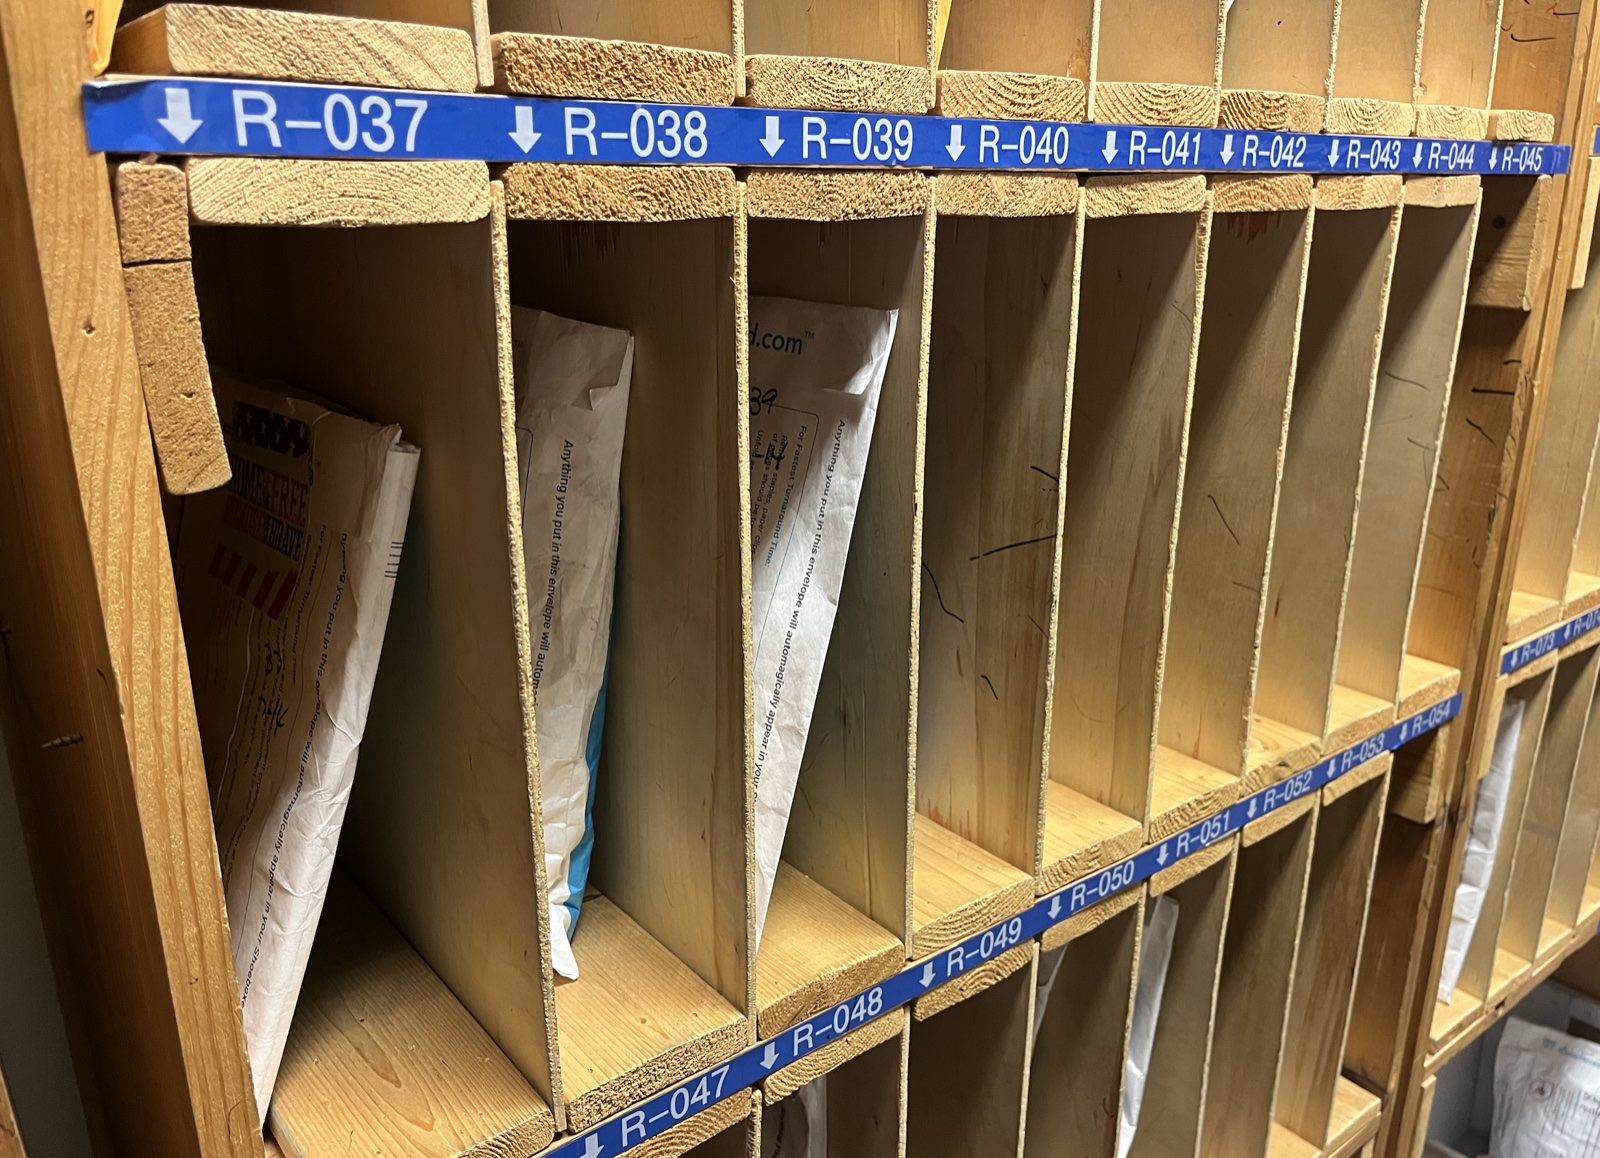 Each customer’s envelope goes into a sorted slot. We process them one at a time so receipts never get mixed across accounts.
 A customer’s envelope, opened. Every receipt gets sorted, prepped, and scanned by hand by someone in our office before it touches the OCR.
 After scanning, the originals go to secure shredding. The customer’s digital records live forever in their account.
Paper isn’t dead. A big chunk of what our customers send us still arrives by mail, phone photos make up another big chunk, and email forwards round out the rest.
That input mix drove the four-format design. Different inputs deserve different workflows.
Audit-proofing: 3 small habits that hold up under review
The IRS doesn’t audit randomly. They flag returns where the records look thin. Here are three habits that take 30 seconds each and pay for themselves the first time you get a notice.
Habit 1: Photograph thermal receipts the day you get them
The little CVS, gas station, and restaurant receipts printed on thermal paper fade in 6 to 12 months. By tax time the next year, half of them are unreadable. Snap a photo the same day, before the ink walks off.
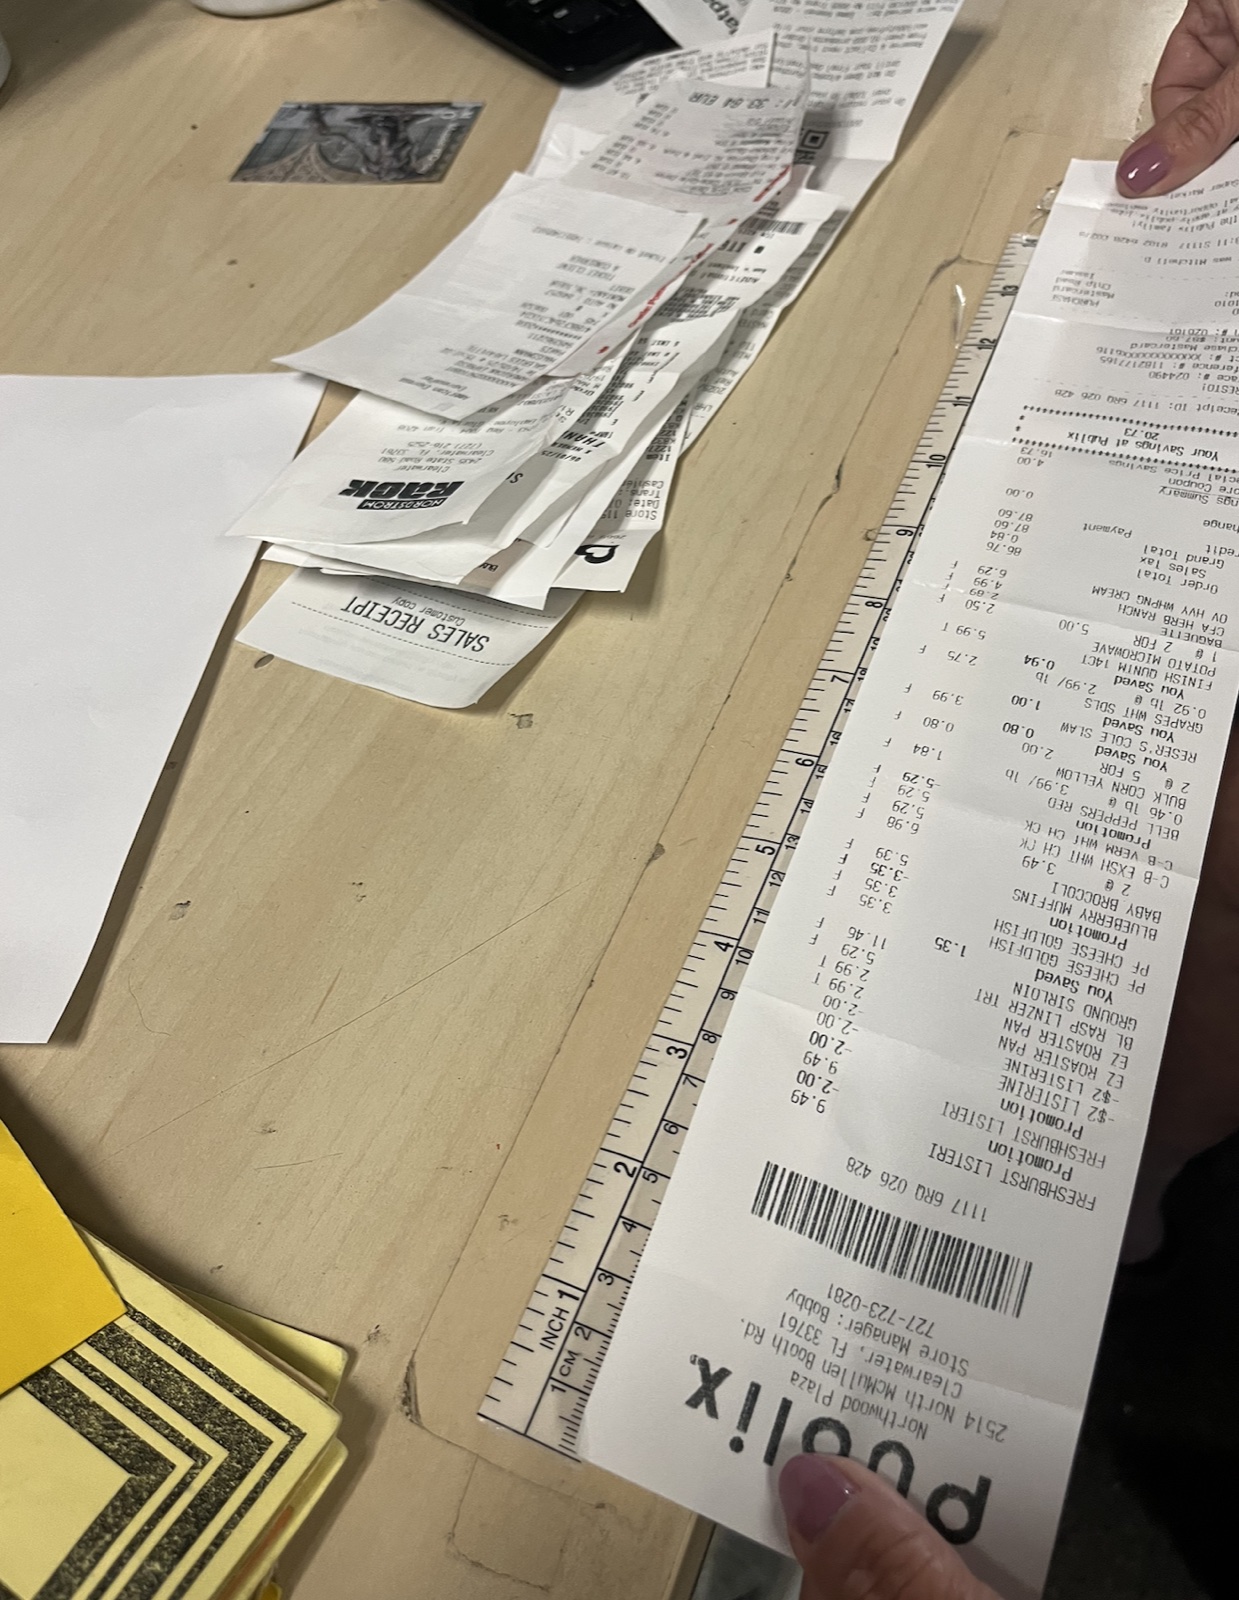 A real customer sent us this receipt, photographed here against a 12-inch ruler. The whole thing prints on thermal paper from one store run. A phone photo saves you when the ink fades 12 months later.
Habit 2: Categorize as you go, not at year-end
Remember the 28.5% blank-tag stat from our data? Almost all of those are last-minute filers trying to remember in March what a $42 charge in July was for. Two minutes at point of purchase beats two hours in April.
Habit 3: Write the business purpose in one sentence per receipt
Write something specific: “Lunch with prospect to discuss Q3 contract.” “Office supplies for client mailing.” “Gas for site visit at 4400 W Pine.” Specific notes beat generic ones every time, and specific is what an auditor wants to see when they ask why this expense belongs on your Schedule C.
Small habits at purchase pay off big at tax time.
For a quick gut-check on whether you’re capturing your home-based business setup correctly, our home office deduction calculator walks through what a defensible home office claim looks like in about two minutes.
Does Excel have an expense report template?
Yes, Microsoft Excel includes several built-in expense report templates, but they ship with only 6 to 8 categories. The free template above covers the 15 categories most small businesses use, with dropdowns and pre-built formulas, and the category list comes from analysis of 2.4 million real receipts.
Microsoft’s templates are a fine starting point if you only have 5 or 10 receipts a year. For anything more, the missing categories force real expenses into “Other,” and “Other” doesn’t survive an audit.
Is there a free online expense sheet I can use?
Yes, the Google Sheets version of this template is free, online, and one click away from being copied into your own Google Drive, with no signup, no email gate, and no trial running in the background. Open the link, hit “Make a copy,” and start typing.
The Sheets version auto-totals as you type, lets you share with an accountant in two clicks, and works on any browser. It uses the same 15 categories and the same column structure as the Excel version, so switching between the two takes no learning curve.
If you’d rather not type at all
 This is our Durham headquarters. We’ve processed receipts since 2007.
I’ll be straight with you. Typing receipts into a spreadsheet is the slowest way to do this. Some people like the control, but most people would rather skip the typing.
Here’s what we built at Shoeboxed for the second camp:
- Magic Envelope. Stuff your receipts in the postage-paid envelope, mail it to us, and we scan and categorize each one into your account. Think of it as a bookkeeper in your mailbox.
- Mobile app. Snap a photo of any receipt. We OCR it, categorize it, and upload it to your account in seconds.
- Automatic mileage tracking. The app logs your business trips by GPS in the background, then texts you a daily summary so you can label business trips with one tap.
I bought Shoeboxed in late 2025 after fifteen years of running other people’s companies as CEO. I’d used Shoeboxed myself back in 2010 at a previous gig and called it magical even then, and use it daily now. Small business owners deserve every dollar they’re legally entitled to keep, that’s why I bought Shoeboxed and work hard to make it better. More on why I bought it.
If the spreadsheet is enough, keep the spreadsheet. If you ever want to stop typing, our pricing page lists every plan. Either way, the template is yours.
FAQ
How do I create a basic expense report?
Open a spreadsheet and make four columns: Date, Vendor, Amount, Category. Add a fifth column for Business Purpose (the one most people skip). Enter one row per receipt and total at the bottom. The expense report template above does all of this with dropdowns and a sum formula already built in.
How do I do an Excel sheet for expenses?
Download the Excel version above. Enter receipts row by row and pick a category from the dropdown in column D. The formula at the bottom auto-totals as you type. Save a copy each month with the month and year in the filename, and you have a monthly expense report ready for your accountant.
What’s the difference between an expense tracker and an expense report?
An expense tracker logs your expenses all year. An expense report snapshots one period: a month, a quarter, or a tax year. The same template handles both. The Monthly variant above shapes itself for reports out of the box.
How long should I keep my expense records?
The IRS general rule is 3 years from the date you filed your return (the period of limitations on assessment). Keep both the spreadsheet AND the underlying receipts (photos or originals) for that window. Special cases extend longer: 6 years if you underreported income by more than 25%, 7 years for losses on worthless securities or bad debt, 4 years for payroll-related records, and indefinitely if you never filed. See the IRS recordkeeping guidance for the full breakdown.
Wrap
The template comes in four formats, packs fifteen categories built from real receipts, bakes the four IRS-required fields into every row, and lays out three audit-proof habits along the way. If you ever want to skip the typing, we handle it for you too.
Grab whichever format fits how you work. It’s yours the moment you click. We’ll be here either way, almost twenty years into this.
If your business involves travel, our travel expense report template handles per-diem and the 50% meals rule automatically.
Want the income side and a real profit number too? Our free Google Sheets accounting template builds a Schedule C profit and loss statement as you go.
Once your business is set up as an S-corp or partnership, take a look at the Augusta Rule — rent your home to your business up to 14 days a year, tax-free on the rental income.
Run a farm or ranch? You file Schedule F, not Schedule C, so use our farm expense spreadsheet that maps every receipt to the right Schedule F line.
In the trades? Our free construction expense tracker maps every contractor cost to its Schedule C line.
Changelog - May 2026: Rebuilt from scratch around aggregate data from 2.4M+ real receipts. New 15-category list, 4 format options, audit-proofing section, mileage gap, soft Shoeboxed pitch at end. - February 2024: Original “5 Free Templates” roundup published.
