


How expense management tools process email receipts can make a big difference in the time and money spent on tracking and incorporating these expenses into your system.
Not only do these tools simplify the tedious task and hassle of expense tracking, but they also offer a blend of efficiency, accuracy, and strategic financial management.
Here, we compare how Shoeboxed and Expensify manage email receipts for expense report tracking and tax deductions so you can decide which one is more efficient for your business.
How Expensify manages emailed receipts
You can forward your email receipts to Expensify.
Expensify is a popular tool for managing business expenses and transactions. You can forward email receipts from your inbox directly into your Expensify account.
Here’s a step-by-step guide on how to email receipts from your computer into Expensify’s system.
Step 1: Set up your Expensify account
Ensure you have an active account before uploading your email receipts to Expensify. Sign up or log in to Expensify via their website or mobile app. During the setup process, you will be asked to provide an email address; this address will be used to send receipts to your Expensify account.
Step 2: Verify your email address
To begin emailing receipts to Expensify, you must verify the email address from which you will send them. The Expensify team requires this to ensure security and prevent unauthorized submissions.
Go to the Settings menu in Expensify.
Navigate to Account and then Secondary Logins.
Add and verify any email addresses you will use to forward receipts to Expensify.
Step 3: Emailing receipts
Once your email addresses are verified, you can forward your receipt to: receipts@expensify.com.
Attach images of your receipts or PDFs to the email. You can attach multiple receipts to a single email.
No need to include a subject line or body text in your message unless you want to add specific details for personal reference. Expensify's SmartScan technology will automatically extract the relevant data from the receipts, with or without a subject line.
Step 4: Managing emailed receipts to Expensify
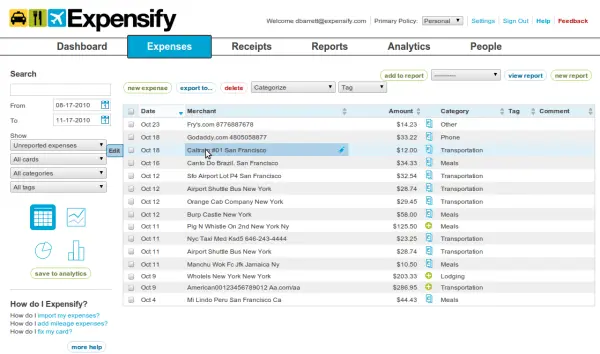
Expensify's expenses page shows a list of your digital receipts.
After you forward your receipts, they appear in your Expensify account under the Expenses tab. Expensify’s SmartScan will process the receipts, extracting essential details such as merchant, date, and amount.
If you have any questions regarding expenses and Expensify email receipts, you can check out Expensify student ambassador posts made by a team of Expensify student ambassadors.
See also: 4 Top Expense Management Automation Software Solutions
How Shoeboxed manages emailed receipts
Shoeboxed makes keeping track of expenses and your receipts easy.
Shoeboxed manages emailed receipts primarily through its Gmail integration, which is designed to automatically extract receipt information directly from your Gmail account.
Shoeboxed's automatic Gmail Receipt Sync feature
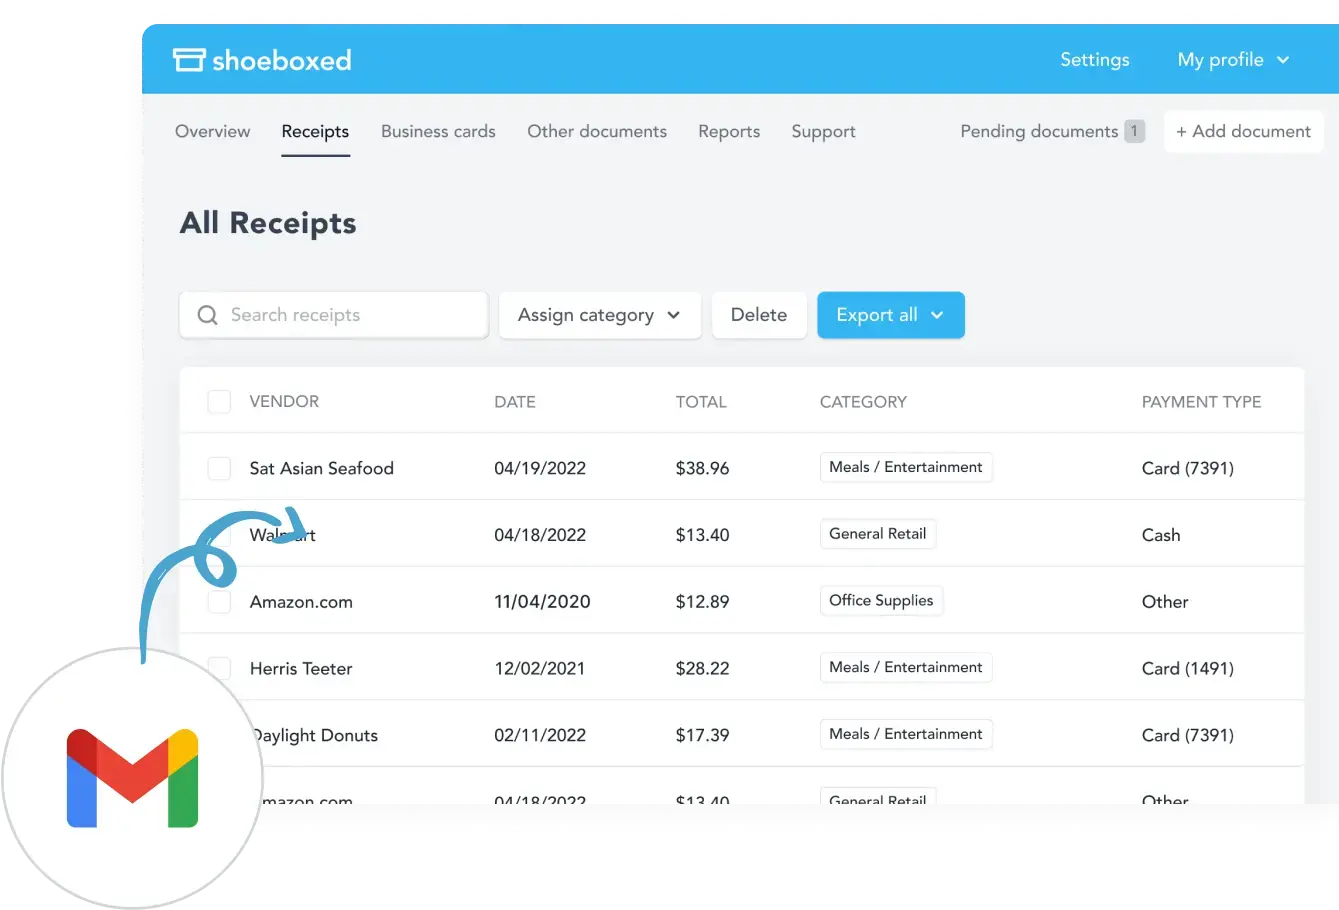
Auto-import your receipts from Gmail to Shoeboxed.
Shoeboxed has a feature specifically for Gmail users that automates receipt management. Once you link your Gmail account to Shoeboxed, the system scans your emails to identify those containing receipts.
The software automatically pulls receipts from your emails and imports them into your Shoeboxed account. This includes receipts embedded in the subject line or body of the emails and those attached as PDFs, images, or other document formats.
Here's a step-by-step guide to setting up the Gmail Receipt Sync feature:
Step 1: Account linking:
You start by authorizing Shoeboxed to access your Gmail account. This permission allows Shoeboxed to scan your email for receipts.
Step 2: Email scanning:
Shoeboxed uses algorithms to sift through your emails, looking for purchase confirmations, e-receipts, and other transaction-related emails.
Step 3: Receipt extraction:
Once a receipt is identified, the system extracts the necessary information and converts it into a digital entry within your Shoeboxed account.
The receipts are categorized and stored securely, where you can access them anytime for expense reporting or tax purposes.
Step 4: Privacy and security:
Shoeboxed ensures that the process complies with privacy standards and security protocols to protect sensitive information accessed in your emails.
Users have control over the permissions granted to Shoeboxed and can revoke access at any time if they choose to stop using the service.

Users can scan paper receipts using the Shoeboxed app and smartphone camera.
If you don't have a Gmail account, you can scan your receipt with the Shoeboxed app and your smartphone's camera. Once the receipt is scanned, Shoeboxed's OCR technology extracts the relevant data, which is uploaded into your account and auto-categorized into 15 tax or custom categories.

The Magic Envelope is for sending receipts to Shoeboxed for processing.
If you'd rather use Shoeboxed's service instead of its app, you can mail your paper receipts in a prepaid postage envelope called The Magic Envelope to Shoeboxed's processing center. They will scan, human-verify, and upload the data into your account.
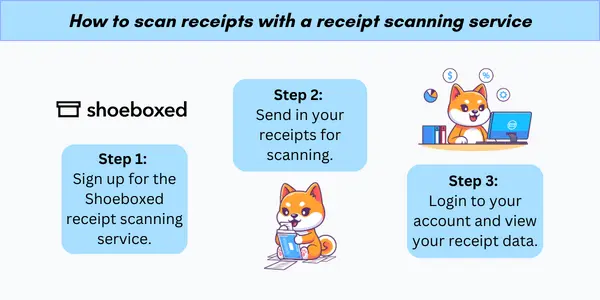
Scan receipts with Shoeboxed's scanning service in three steps.
The app and The Magic Envelope, unique to Shoeboxed, are incredibly convenient and helpful for users who are always on the go or a business trip. Drivers can keep The Magic Envelope on their car dashboard and fill it with receipts as they pay for gas, meals, etc.
Stop doing manual data entry 🛑
Outsource receipt scanning to Shoeboxed’s scanning service and free up your time for good. Try free for 30 days! ✨
Get Started TodayExpensify vs. Shoeboxed
One critical feature of comparing expense management tools, particularly Expensify and Shoeboxed, is the efficiency and ease of integrating receipt tracking with email systems.
Here's a detailed comparison of Expensify's email receipt forwarding versus Shoeboxed's Gmail receipt sync capability.
Expensify's pros and cons
Expensify allows users to email receipts directly to a designated email address (receipts@expensify.com). Users must verify their email addresses within the Expensify system to use this feature.
Each receipt is processed using Expensify’s SmartScan technology. This technology automatically extracts key information from digital receipts, such as merchant, date, and amount, and then creates a corresponding expense entry in the user's account.
Pros:
Users can manually forward receipts in a message from a different email address to Expensify if they have added the email to their Expensify account.
Expensify provides a manual selection process for users who want to control which receipts to submit into the system.
Cons:
Requires users to manually email each receipt, which can be time-consuming if many receipts need to be processed.
Shoeboxed's pros and cons
Shoeboxed features a Gmail receipt sync that automatically imports receipts from the user's inbox into a Shoeboxed email account. It scans emails for receipt-related information and extracts it without any manual message forwarding required by the user.
Shoeboxed's Gmail receipt sync feature offers a highly efficient way to handle emailed receipts by automating the extraction and categorization of receipt information directly from Gmail.
Users enable this feature by linking their Gmail accounts, allowing Shoeboxed to access emails to identify, track, and import receipts.
Pros:
A fully automated process saves considerable time and effort, especially for users who receive a high volume of receipts in their Gmail.
Shoeboxed minimizes the risk of missing receipts since it automatically scans all incoming emails.
Users can focus more on analyzing expenses than tracking them.
Cons:
The automated Gmail receipt sync feature is only available for Gmail users. For those who don’t have Gmail, they can manually forward receipts into their Shoeboxed account. Additionally, users who use other email services can use Shoeboxed's app and scan receipts using their smartphone camera or send paper receipts in the Magic Envelope for Shoeboxed to scan, human-verify, and upload into your account.
Key differences between Shoeboxed vs Expensify
-
Automation vs. manual processing:
Shoeboxed offers a high level of automation for Gmail users, which is great for efficiency. Users of other email services can use the Shoeboxed app and scan those receipts with their smartphone camera or send them to Shoeboxed in a Magic Envelope for processing.
Expensify requires a manual forwarding process of emailing each receipt.
-
Control over receipt submission:
Expensify allows users to decide which receipts to email, giving them more control over what gets submitted and processed.
Shoeboxed automatically processes all receipts found in Gmail, which is convenient but offers less control over selective submission.
Turn receipts into data for tax time ✨
Try Shoeboxed’s systematic award-winning approach to receipt tracking for tax season. Try free for 30 days!
Get Started TodayFrequently asked questions
Can I send receipts from any email to my Expensify account?
You can email receipts to Expensify from any email service by forwarding them to receipts@expensify.com if that email address has been added to your login Expensify account.
What is the easiest way to handle email receipts for expense tracking?
Shoeboxed has a feature specifically for Gmail users that automates receipt management. Once you link your Gmail account to Shoeboxed, the system scans your emails to identify those containing receipts.
The software then automatically pulls receipts from your emails and imports them into your Shoeboxed account. This includes receipts embedded in the body of the message in the emails and those attached as PDFs, images, or other document formats.
In conclusion
Both platforms aim to simplify the expense management process but do so differently when it comes to email receipts. Expensify offers a manual receipt forwarding process that gives you control over which receipts to send.
Shoeboxed, however, features a Gmail receipt sync that automatically imports receipts from a user’s account. It scans emails for receipt-related information and extracts it without any manual forwarding required by the user. With Shoeboxed, more time is spent on analyzing expenses than tracking them.
Caryl Ramsey has years of experience assisting in different aspects of bookkeeping, taxes, and customer service. She uses a variety of accounting software for setting up client information, reconciling accounts, coding expenses, running financial reports, and preparing tax returns. She is also experienced in setting up corporations with the State Corporation Commission and the IRS.
About Shoeboxed!
Shoeboxed is a receipt scanning service with receipt management software that supports multiple receipt capture methods: send, scan, upload, forward, and more!
You can stuff your receipts into one of our Magic Envelopes (prepaid postage within the US). Use our receipt tracker + receipt scanner app (iPhone, iPad and Android) to snap a picture while on the go. Auto-import receipts from Gmail. Or forward a receipt to your designated Shoeboxed email address.
Turn your receipts into data and deductibles with our expense reports that include IRS-accepted receipt images.
Join over 1 million businesses scanning & organizing receipts, creating expense reports and more—with Shoeboxed.
Try Shoeboxed today!
